GlossWorks Detailed: 1989 Nissan Figaro
A few weeks ago, GlossWorks had the pleasure of detailing this exceptionally unique and rare retro car known as the Nissan Figaro for a good friend of mine. For those who have never seen this car or don’t know much about it, here’s some information about the car:
“The Figaro’s retro styling is accentuated by liberal amounts of chrome, from the bumpers to the boot hinges. But retro doesn’t mean outdated. This stylish city car sports a 987cc turbo charged engine boasting a reasonable 76bhp at the front wheels, and three-speed automatic transmission. Creature comforts include a retro-styled CD player, air conditioning, all-white leather-trimmed interior, and canvas roll down top.” (NissaFigaro.ca)
This particular car was in for a restorative detail, including a major paint correction to enhance the very faded and swirled up paintwork. Since it was a 20+ year old car and some panels had thinner clear coat than others, care was taken to not burn through the paint and thus different panels received varying levels of correction.
The Nissan Figaro is an awesome little car.

But this one has seen its share of wear over the last 20+ years.

Every panel showed signs of deep swirls and scratches.

Close up of the swirls.

Paint was very faded with little reflection.

Terrible swirling on the boot lid.

The chrome trim and accents were filthy and lacked sharp reflections.

All the rubber trimming around the car showed their signs of age.

The door jams had very stubborn dirt.

Algae found along the jams from having been stored outdoors for many years during the winter months.

More dirt under the hood.

Tail pipes needed some good polishing.

Lots of dirt under the gas cap.

The car was first given a good foam down to release the majority of the light dirt…

…after being pressure washed off, it was given a soapy hand wash (It was below freezing, notice the snow in the background).

More algae along the boot jams.

All cleaned up.

Even though this canvas top had recently been re-trimmed within the last year, sitting under a tarp with built up moisture this past winter has left a serious coating of dirt and algae. Bottom section cleaned up.

Gas lid removed and the area around the gas cap was given a thorough cleaning.

The gas lid was reinstalled and looking much better.

After the car was pulled indoors and dried, it was time to inspect the paintwork and start the paint correction. Lots of etching on the front fender.

Etching removed and gloss restored.

The paint was lacking gloss in some areas due to water spots etching into the clear coat.

After correction, the depth of the paint and the gloss was restored.

The hood was scratched up and looking faded before the paint correction.

The hood looking much glossier after paint correction, before any wax and sealant was applied.

The sidemarkers were removed to reveal years of dirt.

That was all cleaned up and ready for reinstallation.

Time to move on to the interior. Leather showing lots of dirt.

The seats were cleaned with a leather cleaner.

Then a leather conditioner was applied and allowed to sit overnight before buffing off the excess product.

Here are the seats all completed.

Scuff marks left from the shoes from entering and exiting the car.

Scuffs removed. The vinyl did show signs of wear.

The convertible top was then removed to reveal lots of mold around the gutters.

All the mold removed.

More dirt on the gutters.

The rubber trim was removed and the area all cleaned up and sealed.

Build up of harmful bacteria and mold on the back of the dash.

After bacteria and mold removal, the area was properly sanitized.

One of the most disgusting parts of the car. The area between the roof and the canvas top had lots of moisure built up so lots of mold spores were allowed to freely grow in between the layers.

That was all cleaned up and sanitized.

Hubcaps were removed for repaint, but I decided to polish them instead to keep the OEM color.

Unpolished hubcaps on the left looking very faded, while the one on the right had been polished. Not all the scratches and curb marks were removed, but this process did a good job of restoring the gloss that they were lacking.

A close-up 50/50 view of the difference the polishing made.

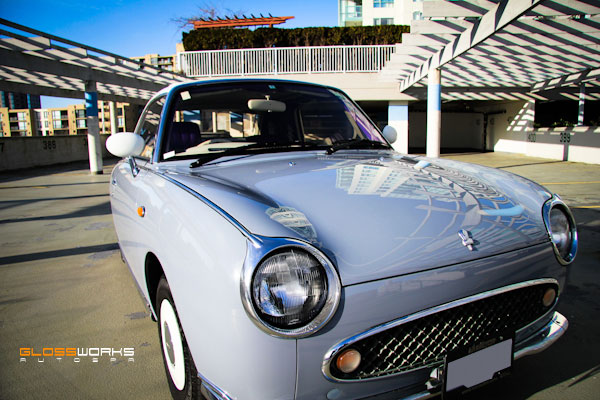
Here are some finished pictures after about 30 hours of hard work on this classic car (After shots taken by my friend and photographer, Samuel Ong).


Notice the difference in gloss and reflections!


Thanks for watching! Please leave a comment down below if you enjoyed this writeup!

A HUGE SHOUTOUT goes to my good friend Samuel Ong for taking the time to give this car a well-deserved photoshoot after the detail was completed. Check out his website at www.brandedbysam.com
DAMN!!!!!!! thats like BRAND NEW!!!! SIMPLY AMAZING!!!!!!!!!
Thanks Sam, thanks again for the photoshoot. The pics turned out perfect!